Email reports
On this page:
About emailing reports
Use the Email Scheduler in the Reports page header to automatically email reports to parents, staff, and others, on a one-time, daily, weekly, or monthly basis. The reports are included as attachments to the email, in PDF format. PDF documents are usually opened by the operating system's default PDF application. If you are not able to open a report, you may need to install Adobe® Reader®, which is available as a free download from Adobe's Web site.
- To set up emails, attach reports to the emails, and schedule the emails for delivery, see Create a new email and schedule delivery.
- To view, edit, and delete the emails you've scheduled, see Manage your scheduled emails.
- To unsubscribe to the emails, see Unsubscribe from email.
When are the emails sent?
mySciLEARN uses the following schedules for sending emails. For more information on scheduling see the task Create a new email and schedule delivery.
- One Time. The reports will be emailed immediately.
- Daily. The reports will be emailed every day.
- Weekly. The reports will be emailed at the end of every week.
- Every 4 Weeks. The reports will be sent at the end of the fourth week on a set four-week schedule (starting from July 27, 2013). Every four weeks, the system will send the next round of emails. Based on today's date (as read from your local computer), you can expect the next round of emails to be sent on or around:
Open the Email Scheduler
Follow these steps to access the Email Scheduler.
- In the mySciLEARN Manage section, click the Reports tab to open the Reports page.
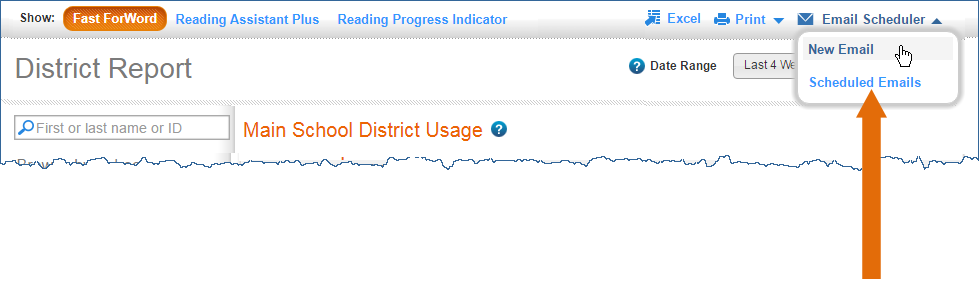
- From the Email Scheduler menu in the top right of the page, chose the email option you'd like to use:
- New Email. Choose this option to create a new email and schedule delivery.
- Scheduled Emails. Choose this option to manage your scheduled emails (view, edit, or delete the emails).
Create a new email and schedule delivery
Use the New Email screen to create and schedule new emails for delivery. The following task provides step by step instructions, along with everything else you'll need to know about new emails, such as scheduling options and report availability.
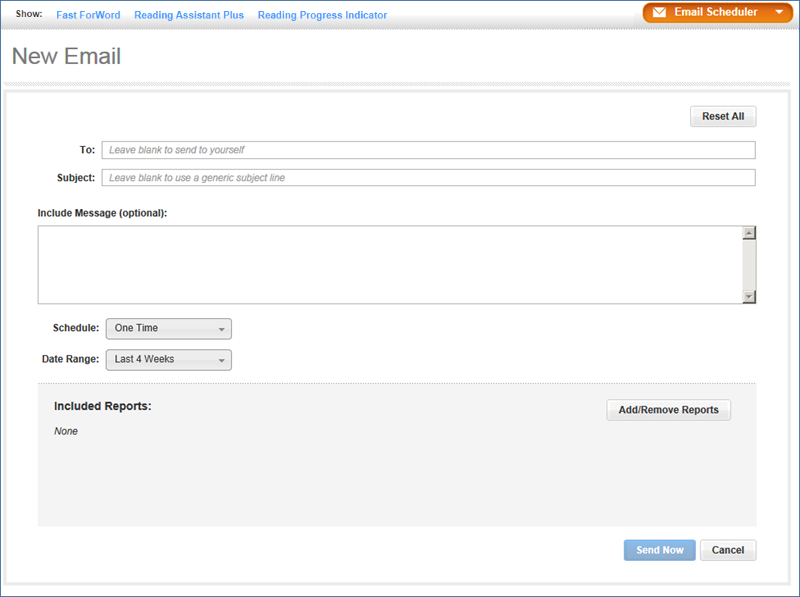
- From the Email Scheduler menu in the top right corner of the Reports page, click New Email.
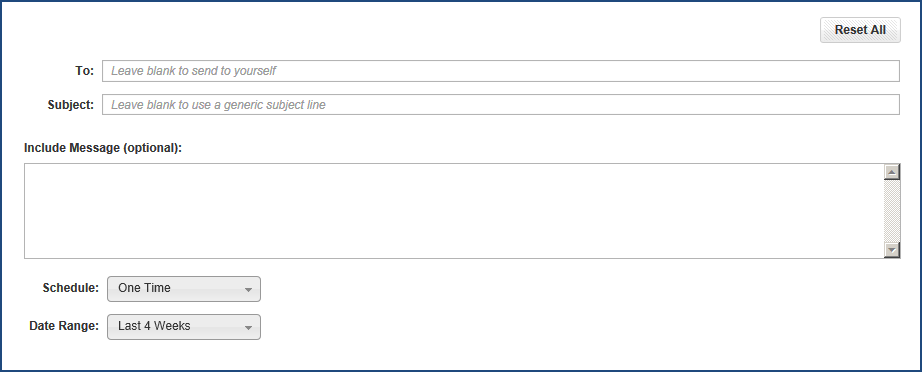
- On the New Email screen, enter the following information to set up your new email.
- To. Enter the email address of the recipient, in the following format only: name@domain. For example, doejane123@maindistrict.edu. To send the email to yourself, leave this field blank. To send the email to multiple recipients, separate each email address with a comma or semicolon.
- Subject (optional). Enter a subject line for the email. For example, Fast ForWord Weekly Status. To use a generic subject line, leave this field blank.
- Include Message (optional). Add any comments that you would like to add to the email body. For example, you may want to add a few lines about a school, group, or student, or highlight a particular area of interest within a report.
- Schedule. Use this menu to select how often you would like to send the report. When you schedule a recurring email, that email appears on the Scheduled Emails page (One Time emails do not appear there).
- One Time. The reports will be emailed immediately. Use the menu to select a date range for the student activity in the emailed reports.
- Last 4 Weeks. The reports will include student data from the current calendar week and the previous three calendar weeks.
- This Week. The reports will include student data from the current calendar week.
- Last Week. The reports will include student data from the previous calendar week.
- Custom. The reports will include student data from the weeks in that custom date range.
- Daily. The reports will be emailed every day, and will include student data from the current calendar week.
- Weekly. The reports will be emailed at the end of every week, and will include student data from the calendar week that just ended.
- Every 4 Weeks. The reports will be sent at the end of the fourth week on a set four-week schedule, and will include student data from those four weeks—that is, the calendar week that just ended and the previous three calendar weeks.
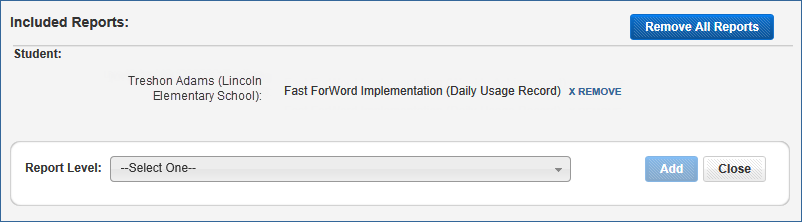
- Click the Add/Remove reports button to start adding reports to the email.
- From the Report Level menu, choose a report level, then click the checkbox next to the reports you'd like to attach to the email and click Add.
- District (district managers only)
- All implementation reports
- Reading Progress Indicator: Auto
- Reading Progress Indicator: All Within Date Range (Custom date range only, cannot be scheduled)
- School (district and school managers only)
- All implementation reports
- Reading Progress Indicator: Auto
- Reading Progress Indicator: All Within Date Range (Custom date range only, cannot be scheduled)
- Group (all staff members)
- All implementation reports
- Fast ForWord Percent Complete
- Reading Progress Indicator: Auto
- Reading Progress Indicator: All Within Date Range (Custom date range only, cannot be scheduled)
- Student (all staff members)
- Fast ForWord Progress (includes all Fast ForWord components in date range)
- Fast ForWord Progress – Completion History section only
- Fast ForWord Progress – Completion History and Details sections only
- Fast ForWord Progress – Errors section only
- Fast ForWord Errors – Last Participation Day (includes all Fast ForWord exercises used)
- Fast ForWord Percent Complete (includes all Fast ForWord components in date range)
- Fast ForWord Usage (includes all Fast ForWord components in date range)
- Fast ForWord Weekly Growth (includes all Fast ForWord components in date range)
- Reading Progress Indicator: Auto
- Reading Progress Indicator: All Within Date Range (Custom date range only, cannot be scheduled)
- Click the Save/Send Now button to complete the setup.
The system uses calendar weeks—Sunday through Saturday—when emailing reports. To keep you informed, reports with no data are still emailed and noted as such.
When are Every 4 Weeks emails sent?
The Every 4 Weeks schedule uses a permanent four week schedule (starting from July 27, 2013). Every four weeks, the system sends the next round of emails.
Because of this standardized four-week schedule, the first email may be sent earlier than four weeks.
Report levels are available based on your staff role. Each level provides the following reports:
Reading Progress Indicator reports tip
To email the Reading Progress Indicator All report (which includes Manual RPI tests), choose a custom date range that includes the assessment results you’d like to email, then choose One Time from the Schedule menu. You cannot send a recurring email with this report.
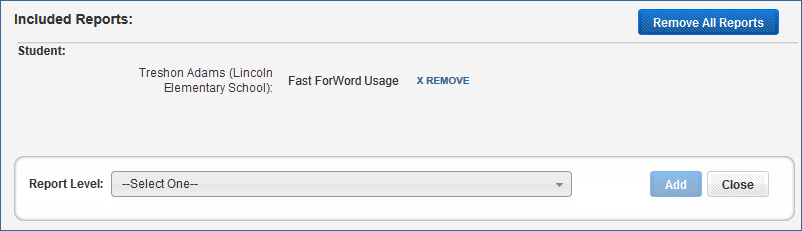
You can add reports for as many of your schools, groups, and students as you like. When you've finished adding reports for a report level, you can repeat these steps to add reports from another level. If you add a report by mistake, click the Remove Report link next to that report. You can also click the Remove All button at the top left to remove all of the added reports. When you are finished adding reports, click Close.
The email is scheduled and/or sent, and the Scheduled Email screen opens. You can review, edit, or delete any of your scheduled emails as needed (One Time emails are not included on this screen). For steps see Manage your scheduled emails. To return to the reports, click the Reports tab.
Manage your scheduled emails
Use the Scheduled Emails screen to track, edit, and delete the recurring emails that you have created. For steps on accessing the Scheduled Emails screen, see Open the Email Scheduler.
- You can only access and manage emails that you have scheduled for delivery. Any other emails that exist in your school or district are only accessible to the staff member who created them.
- Because One Time emails are sent immediately (and only one time), they are not tracked and do not appear on the Scheduled Emails screen.
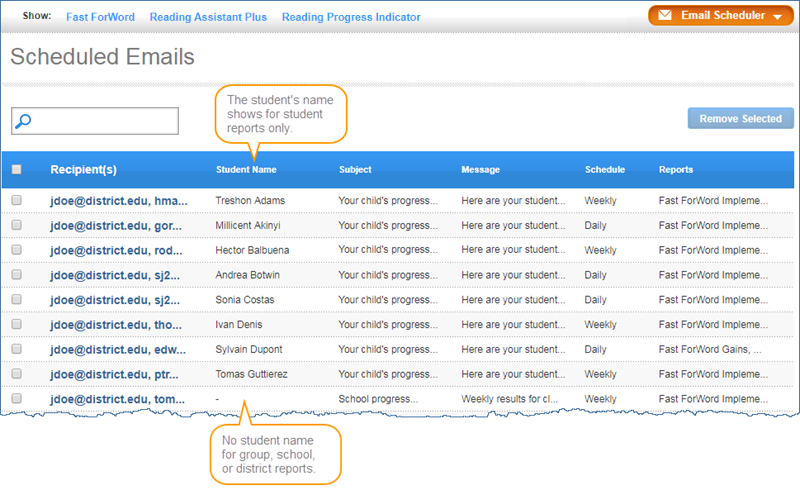
- For student level reports, the student’s name appears in the schedule to help you quickly identify the subject of the report.
- Use the Search field to filter the list by anything on the Scheduled Emails screen (for example, in the following list you could search for “jdoe” or “Weekly”). This field is not case sensitive.
View your scheduled emails
Use the Scheduled Emails screen to view a list of the emails you've scheduled, and then view the details within each of those emails. If you don't have any scheduled emails, you'll be prompted to create a new email when you access the screen.
Note: One Time emails are not tracked and will never appear on the Scheduled Emails screen.
- From the Email Scheduler menu in the top right corner of the Reports page, choose Scheduled Emails.
- Recipients, Student Name (for student level reports only), Subject, Message, Schedule, Reports
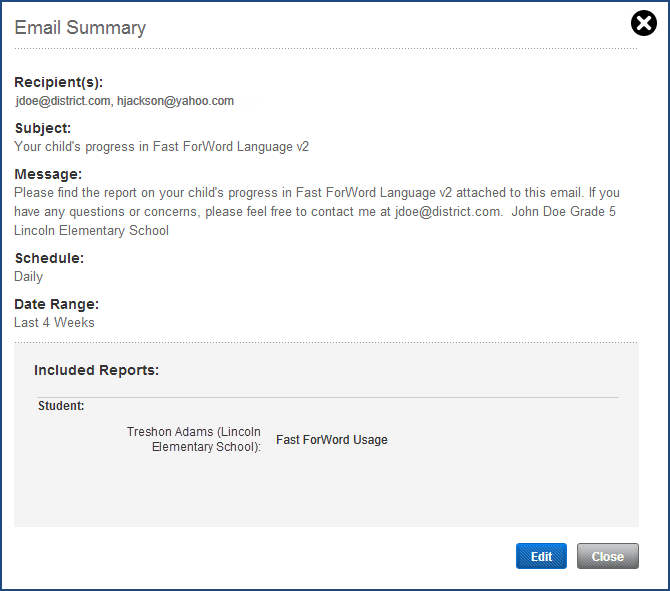
- Click the scheduled email for which you'd like to view details.
- When you've finished reviewing the email, click Close, or click the Edit button to edit the email. See Edit your scheduled emails.
The Scheduled Emails screen opens. If don't have any scheduled emails, you'll be prompted to create a new email. Otherwise, you'll see a list of your scheduled emails. Only the scheduled emails that you've created appear in the list. Each email includes the following information:
The Email Summary screen opens and displays the details for that scheduled email:
Edit your scheduled emails
Use the Scheduled Emails screen to edit any of the emails you've scheduled for recurring delivery; for example:
- Add or remove recipients
- Change the subject and body text
- Add or remove reports
- Change the schedule or date range
- From the Email Scheduler menu in the top right corner of the Reports page, choose Scheduled Emails.
- On the Scheduled Emails screen, click the scheduled email you'd like to edit.
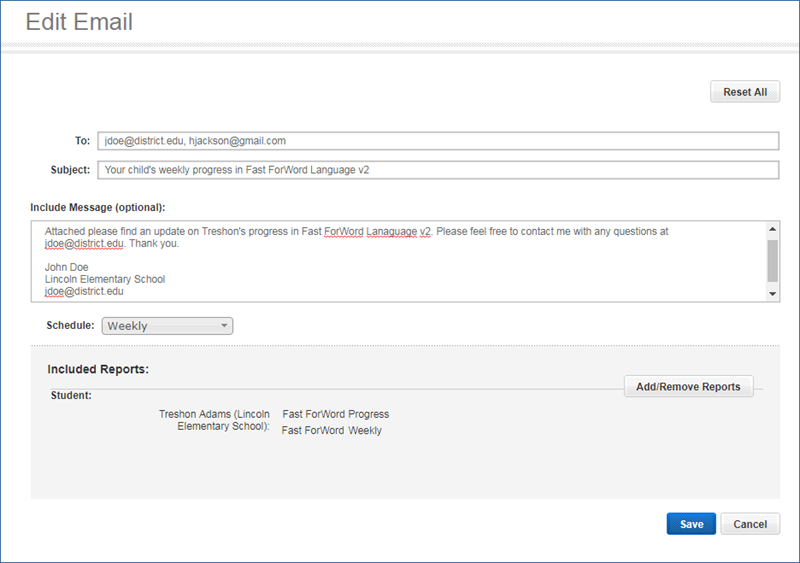
- Click Edit to open the Edit Emails screen.
- Edit the email information as needed.
- Click the Add/Remove reports button to add or remove reports to/from the email and when finished, click Close.
- Click the Save/Send Now button to complete the setup. The edits are saved and take effect immediately.
The Scheduled Emails screen opens and displays all of your scheduled emails in a list.
The Email Summary screen opens and displays the details for that scheduled email.
See Create a new email and schedule delivery for available options. If you need to add or remove reports, continue with the next step. Otherwise, click the Save/Send Now button to complete the setup.
At this point, you can review, edit, or delete any of your other scheduled emails as needed. To return to the reports, click the Reports tab.
Delete your scheduled emails
Use the Scheduled Emails screen to delete any or all of your scheduled emails at any time; for example, if one of your students transfers to another school outside the district, or a group of your students graduate and will no longer use the software.
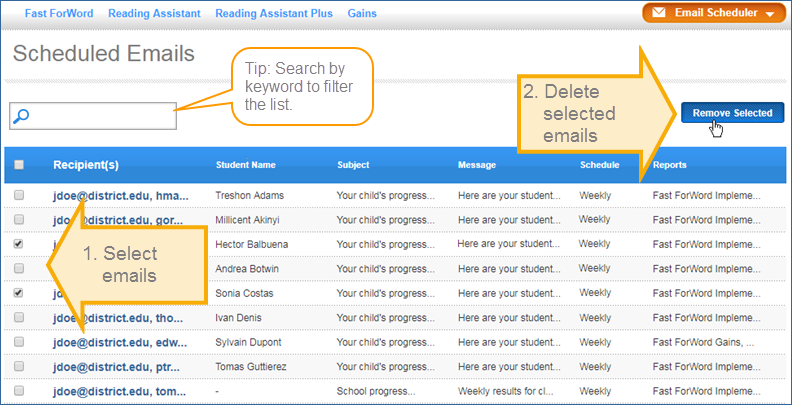
- From the Email Scheduler menu in the top right corner of the Reports page, choose Scheduled Emails.
- On the Scheduled Emails screen, check the box next to the scheduled email you'd like to delete, or check the box at the top of the column to select all of your scheduled emails.
- Click Yes on the Remove Selected Emails confirmation screen. The emails are immediately deleted and will no longer be sent.
The Scheduled Emails screen opens and displays all of your scheduled emails in a list.
Unsubscribe from email
mySciLEARN provides an unsubscribe link at the bottom of the Reports report emails that allows the recipient to permanently opt out of all emails from that district, or to selectively opt out of specific scheduled emails from that district. Upon receiving an unsubscribe request, mySciLEARN complies with that request as follows:
- When opting out of all emails from the district:
- mySciLEARN unsubscribes the recipient from all scheduled emails from the district
- mySciLEARN permanently blocks the recipient from receiving any new Reports report emails from the district
- When opting out of specific emails from the district:
- mySciLEARN unsubscribes the recipient from those emails (other recipients, if any, will continue to receive those emails)
- mySciLEARN continues to send all of the recipient's other scheduled Reports report emails from the district
- mySciLEARN allows district staff members to send new Reports report emails to that recipient
Opting back in
Recipients can use the unsubscribe link on any of their emails to change their email preferences as needed; for example, to opt back in, or to opt out of another specific email.