Complete Reading Assistant Plus microphone check
To ensure good audio signal quality and a satisfactory experience, Reading Assistant Plus automatically administers a microphone check to adjust the audio settings for each student. The microphone check automatically starts the first time a student works the Word Wall activity or the Read and Record activity in a new session. A student or teacher can also manually initiate a microphone check from the Tools menu at the top of the screen; for example, if the microphone is unplugged, if the headset needs adjusting, or the student didn’t do the microphone check.
Using both text and audio instructions, the microphone check prompts the student to read through a few simple screens, and then analyzes and adjusts the audio signal as needed. If the microphone check detects any audio problem, it provides some basic troubleshooting and then initiates the microphone check again. To learn more see Troubleshoot Reading Assistant Plus audio issues.
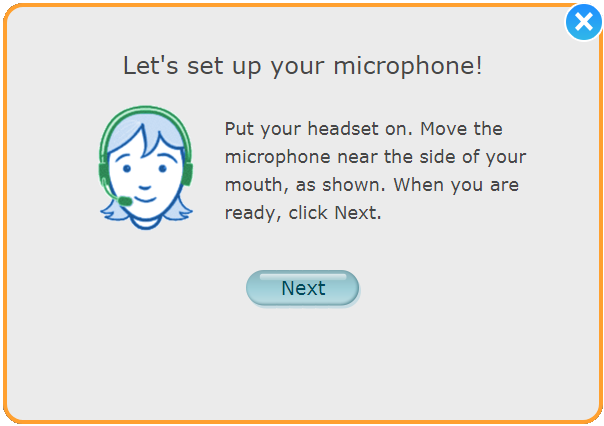
- The first screen introduces the microphone check, and reminds the students to make sure the headset is properly adjusted and the microphone is not directly in front of the mouth (see Set up the headset). Breathing directly into the microphone will cause poor performance. When ready, the student clicks Next to start the microphone check.
If this is the first time the student has ever run the microphone check, the component will prompt the student to allow microphone access in the browser. See Allow Reading Assistant Plus microphone access. The student cannot continue without allowing access.
- The next screen presents the Volume Test, which prompts the student to count to ten. The student should use a normal speaking voice. The audio signal appears in the Volume bar. While counting, the software adjusts the volume of the audio signal according to how loudly the text was read. Ideally, the volume should appear in the green section of the graph.
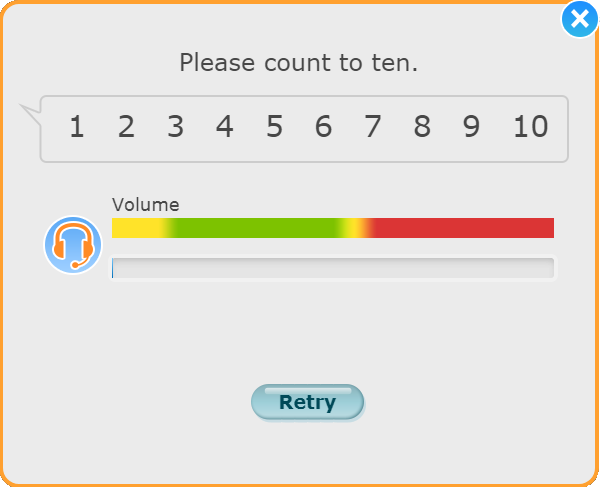
- If the software detects a problem, it advises the student to click Retry and try again. If it still detects a problem, it prompts the student to ask a teacher for help. If no audio problems are detected, the microphone check ends.
- If the check was initiated by the Word Wall activity, the component continues with the activity.
- If the check was initiated by the Read and Record activity, the recording automatically starts.
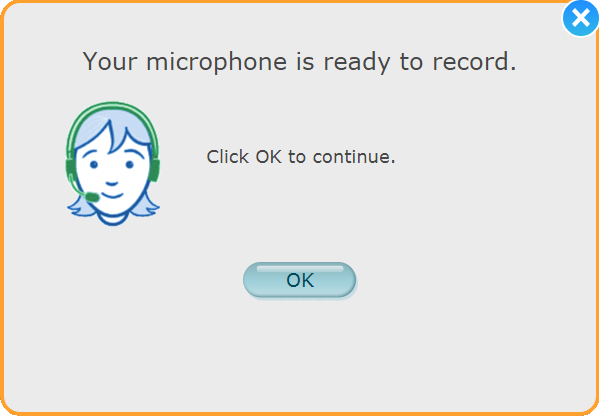
- If the check was initiated by the student, the student clicks OK to exit the microphone check.
- The student clicks OK to exit the microphone check:
 See also