On this page:
Where do I start?
Before your students can work on the Scientific Learning components, you’ll need to add those students to the system, set up student groups, and create student assignments. Use the Students page to manage these enrollment tasks.
See the following topics to learn about managing students:
- To learn how to use the Students page, see the rest of this topic.
- To add students to the system, manage student settings, and create student groups, see the rest of the topics in this section.
- To add, update, or transfer large numbers of students, see Student setup (advanced).
- To create Fast ForWord assignments for your students, see Fast ForWord assignments.
Access the Students page
Use the Students page to create and manage the students at your schools.
- Log in to mySciLEARN as a staff member. See Log in as a staff member.
- Click the Manage tab > Students tab.
All staff members can access the Students page, but each role has a unique view of that page. See The students list.

The students list
When you log in to mySciLEARN and access the Students page, the software reviews your staff role, permissions, and school access, then presents a list of students based on that information. The students list displays different information as you view an individual school, filter by group, or filter by staff. You can also use navigation tools to search for students.
This topic provides information on the different ways you can navigate and use the students list.
Instructor view
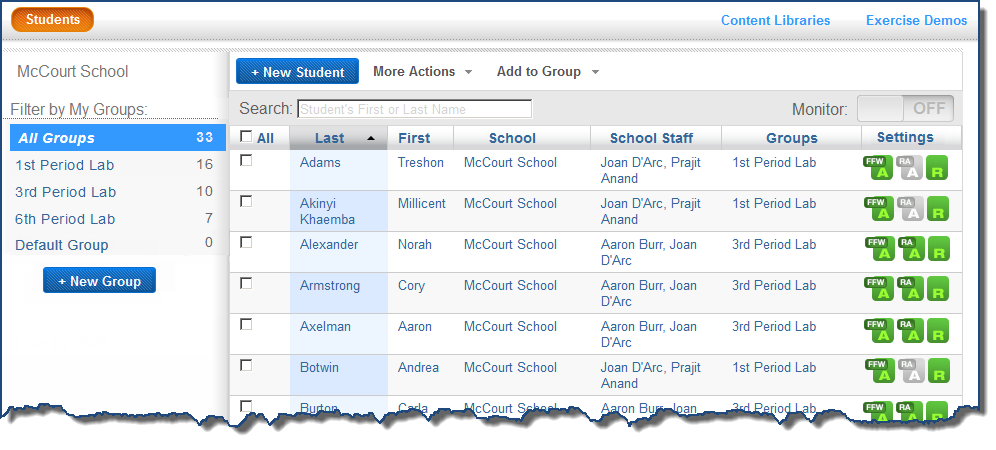
When you log in as an instructor and access the Students page, it opens and displays your school. Within your school, the students are organized and available as follows:
- All of the students associated with you appear in the student list.
- Use the Filter by My Groups list to filter the student list by group; just select that group. To clear the filter, select All Groups at the top of the filter.
- To temporarily reorder the columns in the list, drag and drop the columns in any order.
By default, instructors can access these features and perform these tasks:
- Add, edit, and delete all of their students and manage all of their groups
- Assign, edit, and delete component assignments for their students
- Use the More Actions menu to manage their students, groups, and assignments
- Monitor training sessions for their students
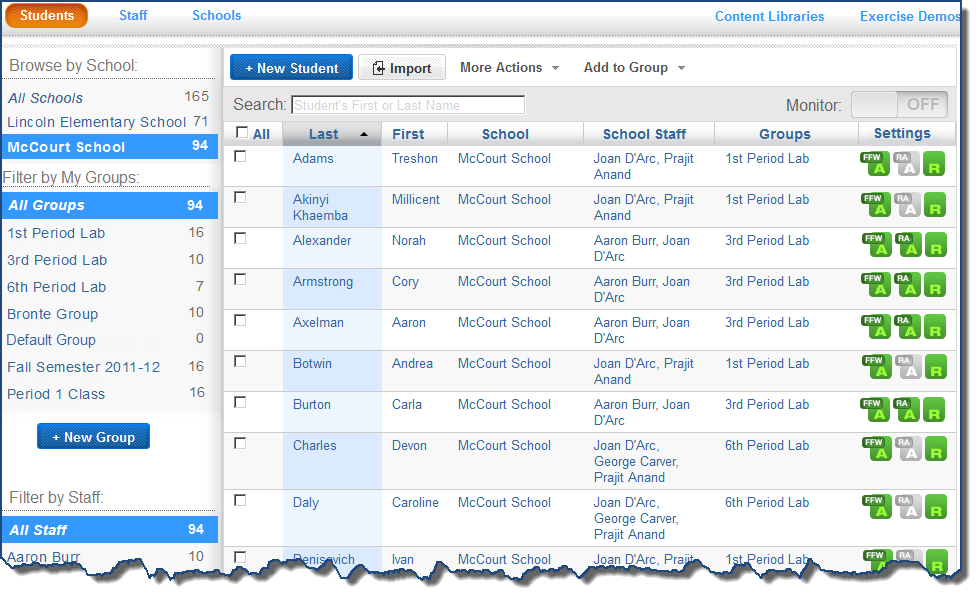
School manager view
When you log in as a school manager and access the Students page, it opens all of your schools. If you are associated with only one school, the Students page opens for that school and displays all of the students in that school. If you are associated with multiple schools, the Students page displays all of the students in your schools. To filter the list by school, select a school from the Browse by School filter. To clear the filter, select All Schools at the top of the filter.
When you select a school, you can continue to filter the student list as follows:
- Use the Filter by My Groups list to filter the student list by group; just select that group. To clear the filter, select All Groups at the top of the filter.
- Use the Filter by Staff list to filter the student list by staff member; just select that staff member’s name. To clear the filter, select All Staff at the top of the filter.
- To temporarily reorder the columns in the list, drag and drop the columns in any order.
By default, school managers can access these features and perform these tasks:
- Add, edit, and delete students
- Assign, edit, and delete component assignments
- Use the More Actions menu to manage students, groups, and assignments
- Import students from a file
- Monitor student work sessions
District manager view
When you log in as a district manager and access the Students page, it opens and displays all of the students in all of the schools across the district. To filter the student list by school, select a school from the Browse by School filter. Then, you can continue to filter the student list as follows:
- Use the Filter by My Groups list to filter the student list by group; just select that group.
- Use the Filter by Staff list to filter the student list by staff member; just select that staff member’s name.
- To clear any of the filters, select the All Schools/All Groups/All Staff options at the top of the corresponding filter.
- To temporarily reorder the columns in the list, drag and drop the columns in any order.
District managers can access all features and perform all tasks on the Students page:
- Add, edit, and delete any student in the system, and manage all groups in all schools
- Assign, edit, and delete component assignments for any student in the system
- Use the More Actions menu to manage students, groups, and assignments
- Import students from a file into any school
- Monitor trainings sessions for any student in the system
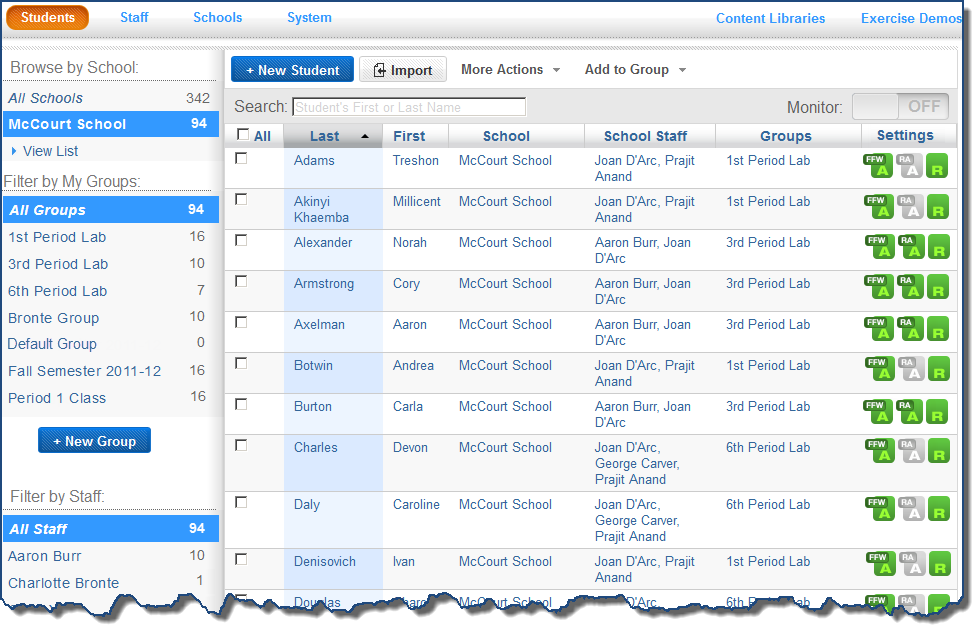
Browse by School filter
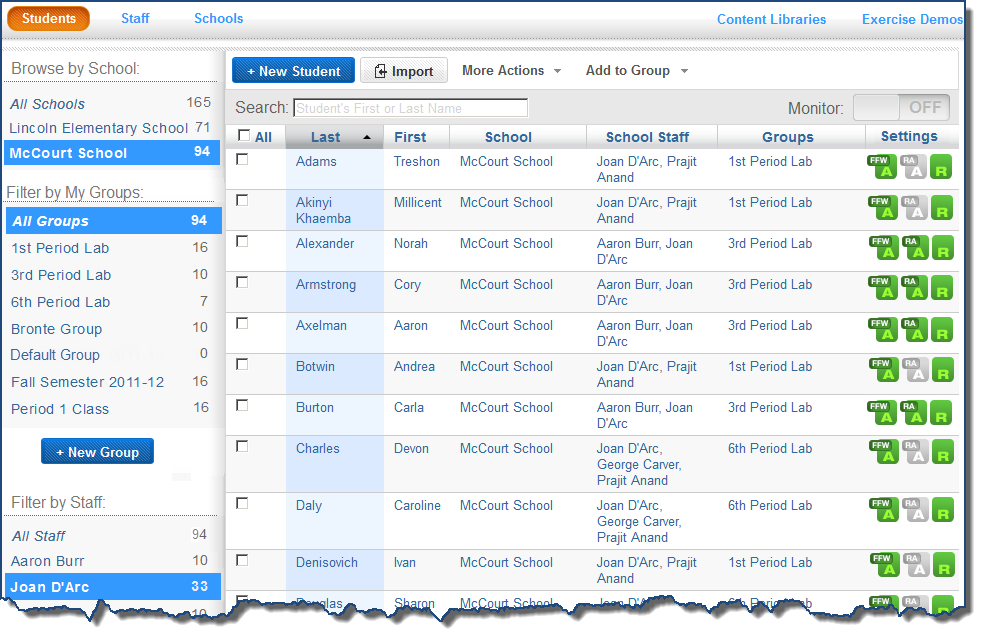
When browsing a school on the Students page, the students list provides the following information for that school:
- Last/First. The first and last name of all students in that school, sorted by last name. When a student is training or taking an RPI assessment, an orange icon appears next to that student’s name
- School. The name of the school you are viewing
- School Staff. The staff members associated with the student
- Groups. The groups to which that student belongs
- Settings. Provides access to the following settings for a student, with buttons that show current state (green = on, gray = off):
![]() Turn Fast ForWord Auto Assign off and on (RPI must be on).
Turn Fast ForWord Auto Assign off and on (RPI must be on).
![]() Turn RPI off and on. When off, both Auto Assign options are disabled.
Turn RPI off and on. When off, both Auto Assign options are disabled.
If you are associated with only one school, you won’t see the Browse by School filter, but you will see the same details for your individual school:
If you are associated with more than one school, the Students page will include the Browse by School filter, which allows you to select and view an individual school. If you are a school manager or district manager and you have access to more than five schools, the list of schools will collapse when you select a school in the Browse by School filter. To open the list and see all of your schools, click View List. The Browse by School filter will expand to include all schools.
Filter by My Groups
The Filter by My Groups filter only appears when you are viewing a school. When you filter the school view by a group, the students list displays the following details for each student in that group:
- Last/First. The first and last name of each student in the group, sorted by last name.
- Assigned Products – The student’s assigned components and component status.
- Protocol – The protocol (schedule) for each assigned component.
- Lang – The language for each assigned component.
- GR – The student’s grade.
- Settings – Provides access to the following settings for a student, with buttons that show current state (green = on, gray = off):
![]() English
English
![]() Spanish
Spanish
![]() Turn Fast ForWord Auto Assign off and on (RPI must be on).
Turn Fast ForWord Auto Assign off and on (RPI must be on).
![]() Turn RPI off and on. When off, both Auto Assign options are disabled.
Turn RPI off and on. When off, both Auto Assign options are disabled.
![]() When training, an orange icon shows next to the student’s name.
When training, an orange icon shows next to the student’s name.
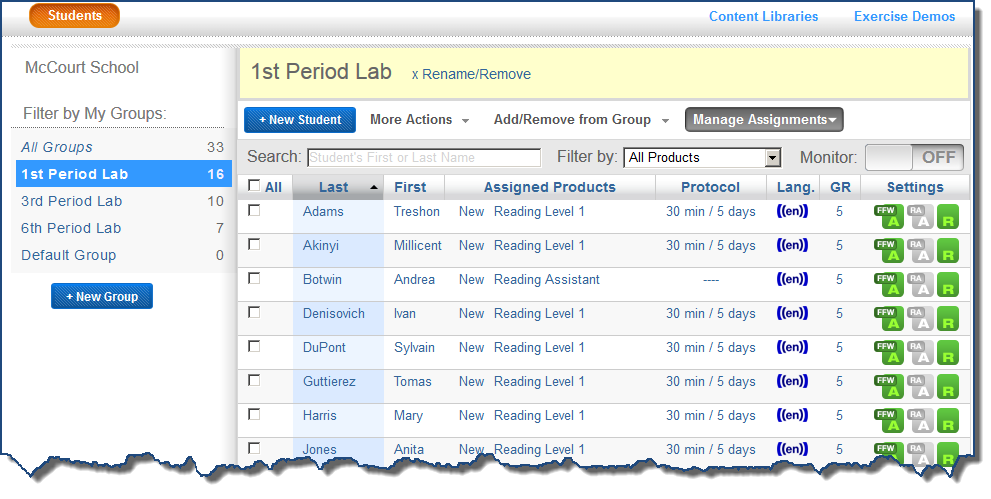
Tips for viewing assigned components
By default, the group view shows all assignments for your students. However, you can filter the group by individual component; for example, you can select Reading Level 1 from the Filter by Product menu to see only those students with that assignment. In addition, each assignment that appears in the group view includes the following status information in the Assigned Products column:
- New – The student has not started working on the component (this is different from 0%, where the student has actually started working on the component but has not yet completed 1%)
- If the student has started working on the component, a completion status appears as follows:
- The Fast ForWord components display a percent complete score for the component.
- components appear in red when their license or Support Package agreement has expired or has not yet started. Hold the cursor over the component name for details. For information on enabling those students to continue working, see Manage licenses for your students.
Filter by Staff
The Filter by Staff filter is only available for district managers and school managers, and only appears when viewing an individual school. When you filter the school view by a staff member, the students list only shows the students associated with that staff member. To return to the original view and see all students, click All Staff at the top of the Filter by Staff list.
Search the students list
Use the following navigation tools on the Students page to find a specific student:
- Use the Search feature at the top of the Students page to search for a student by first name, last name, or student ID. If you're an instructor, the Search feature will only show reports for students that are associated with you.
- Click the Last name, First Name, or School columns at the top of the student list to sort the list alphanumerically. Click again to reverse the sort order.
- Use the Pagination bar at the bottom of the page to scroll through the list pages.
- When you’ve located your student, click the student’s name to view the student’s profile. For details on the viewing a student’s profile, see the rest of this topic.
The student profile
Each student has a student profile. To view the student profile, click the student in the students list. A student’s profile includes basic student information and tasks related to managing that student.
Auto Assign and Reading Progress Indicator
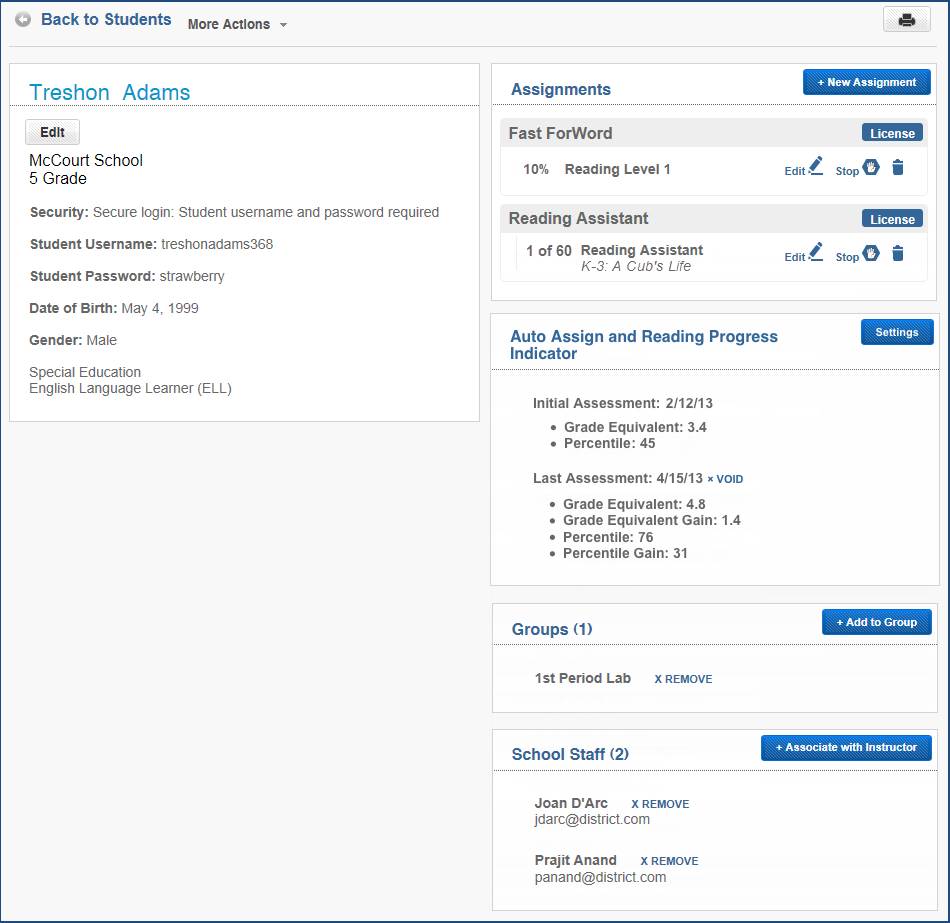
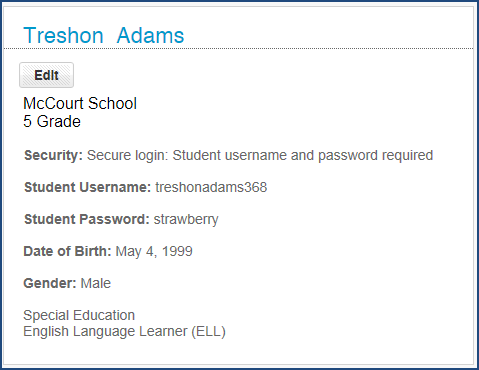
Basic student information
Along with the student's name, this section in the top left corner provides basic student information. Use the Edit button to change this information. See Edit student information.
- School
- Grade
- Username
- Password
- Date of Birth
- Gender
- Other demographic information such as English language learner (ELL). For a complete list of possible student info see Required student information.
Assignments
This section in the top right corner of a student’s profile lets you manage that student's assignments.

To learn more about assignments see Fast ForWord assignments.
- When manually assigning components, you can add new assignments if you have valid licenses. You can also edit, stop, resume, or delete an existing assignment.
- When using Auto Assign to automatically assign components, the system manages the entire assign process for you. However, you can edit an existing assignment if needed.
- A License button appears next to each component, allowing you to manage the licenses and Support Package agreements for the assigned components. See Manage licenses for your students to learn more.
- Auto Assign appears when the student is using that feature. If it cannot assign a component, a Warning (!) icon appears, advising staff to manually assign a component to the student.
- Auto Initial Assignment appears when the student is using that feature.
- New appears next to any assignment that has not been started yet.
- A percent complete score appears when a Fast ForWord assignment has been started.
- If the student has earned a Complete status alert, a green checkmark appears. See About report status updates and alerts.
- Resume appears next to the assignment if it has been stopped.
- A Session Activity section appears when the student is actively training and shows current component status:
- Fast ForWord component and exercise, the number of minutes left in the exercise, the number of trials completed in the exercise
Note: A warning icon appears next to the License button if the student is using an expired license or Support Package agreement, or if all of the available licenses and agreements are expired. If there are no available licenses to manage, the button turns gray and cannot be used. Check with your school manager or district manager for details about the licenses at your school.
Auto Assign and Reading Progress Indicator
This section allows you to enable or disable Auto Assign or Auto Initial Assignment for the student, and void the most recent assessment for a student. See Set Auto Assign and RPI for students.
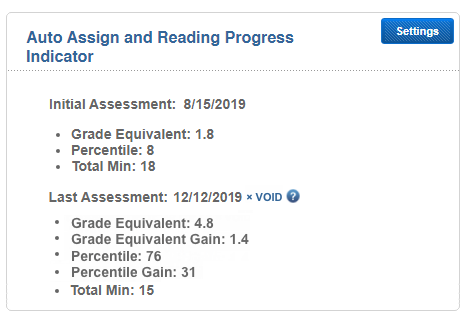
If the student has completed an RPI assessment, assessment results appear in the Reading Progress Indicator panel.
- Initial assessment: grade equivalent, percentile, total time to complete test (rounded to nearest minute)
- Last assessment. grade equivalent, grade equivalent gain, percentile, percentile gain, total time to complete test (rounded to nearest minute). If the assessment was manually assigned, “Manual” appears next to that assessment
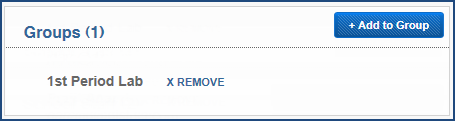
Groups
This section lists the groups to which the student belongs. See Manage group membership.
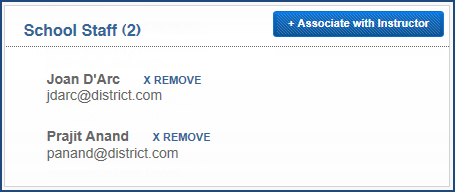
School Staff
The section lists the school staff associated with that student (district managers/school managers only).
Additional items
The student profile also includes the following items:
- More Actions menu. This menu at the top of the screen lets you delete a student's profile (see Delete students), or if you’re a district or school manager, transfer that student to another school
- Print button. Use this button at the top of the screen to print a copy of the student's profile.